A Step-By-Step Guide to Getting Veneers
November 9, 2020

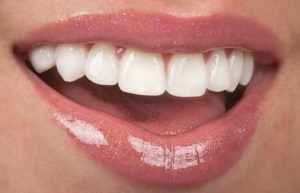
You never get a second chance to make a first impression, and a bright, white smile can be a major factor that makes the difference. A poll conducted by the American Academy of Cosmetic Dentistry showed that 92% of adults view an attractive smile as an important social asset. This view has encouraged people to choose porcelain veneers to obtain the smile they’ve always wanted. If you’re considering veneers but want to know more about the process before committing to it, keep reading! We’ve broken down the 5 key steps you’ll take to get your best smile with veneers in Hampton.
Step 1: Discussing Your Goals with Your Dentist
What do you like and dislike about your smile? What do you think needs to be fixed? It may seem simple, but discussing your smile goals and needs with your dentist is the best way to begin the planning process.
Step 2: The Preview
After you’ve decided on a plan of action with your dentist, you can preview your new smile in many ways. One option is for the dentist to create an exact model of your teeth and then shape veneer-like pieces onto the model using wax to show what can be achieved. Another option is for your dentist to make temporary veneers out of acrylic plastic or tooth-colored dental filling material that can be placed onto your teeth. This option gives you a real-life preview of your new smile. You won’t leave the office with the substance on your teeth, but you can take a few selfies for future reference.
Step 3: Preparing Your Teeth
When you feel confident that your dentist has a full understanding of what you want for your new veneers, your dentist will prepare your teeth. The preparation process can vary from polishing the teeth to removing a layer from the front, biting edges, or sides of the teeth. The goal is to remove as little of the tooth structure as possible, but the amount removed depends on the specific results you’ve discussed with your dentist and the position of your teeth. Your teeth must be prepared to ensure your veneers lay flat and give a natural look. It is important to discuss this part of the process with your dentist before the actual preparation begins, as tooth reduction cannot be reversed.
Step 4: Laboratory Creation
Once your dentist completes the preparation process for your teeth, a mold of them will be made. This mold will be sent to the dental laboratory where technicians will use it to create a replica of your teeth to make veneers specifically for you. This may take several weeks, but while your veneers are made, your dentist will provide you with a set of temporary veneers made of acrylic. Unlike the sample veneers you tried during your preview, these will be cemented to your teeth, allowing you to chew, speak, and smile normally. They will also be contoured to your mouth to ensure comfort and confidence.
Step 5: The Final Step
Once your new veneers have been created and come back from the lab, your dentist will bond them to your teeth using a micromechanical attachment that will essentially make your tooth and your veneer one unit. This cementing process is permanent and will require a professional to remove them, so no need to worry about them coming off.
Veneers are one of the best dental fixes available because of their longevity. With proper maintenance, your veneers can last longer than 20 years! Your cosmetic dentist in Hampton is ready to help you get the smile you deserve.
About the Practice
Drs. Neelima Ravi and Charles Braga offer Hampton families general dentistry as well as advanced treatments like dental implants and gum disease therapy. With a focus on comfort and accommodation, Oceanside Family Dental offers all patients warm, friendly service with beautiful results. They also offer a selection of sedation options to guarantee a stress-free visit. To learn more about getting veneers, visit the website or contact the office at (603)926-1551.
No Comments
No comments yet.
RSS feed for comments on this post.
Sorry, the comment form is closed at this time.
